Excess 14 Starlink Mounting Options
May 18th Update
After a week of the Starlink Mini mounted in the port storage locker, the enclosed compartment was just too much heat. We found the mini resting upside down on a sail bag, quite hot. It was 39° C in Cyprus today, and the enclosed space was just too much. I’ll be likely moving to the bimini mounted option, as it’s hidden, has direct line of sight, and good airflow.
Original Post
Starlink is a game changer as there’s no fussing with local SIM cards or climbing masts for connectivity. For $40/month for 50gb, or $70/month for “unlimited”, it wasn’t a question of whether to use Starlink, but where to mount the transceiver.
There are a few options, such as the roof, which could get flicked off like a fly, or the rear davits which require some brackets, and looks like an appendage.
A fellow Excess owner Nicolas provided this nice option on the helm Biminis. 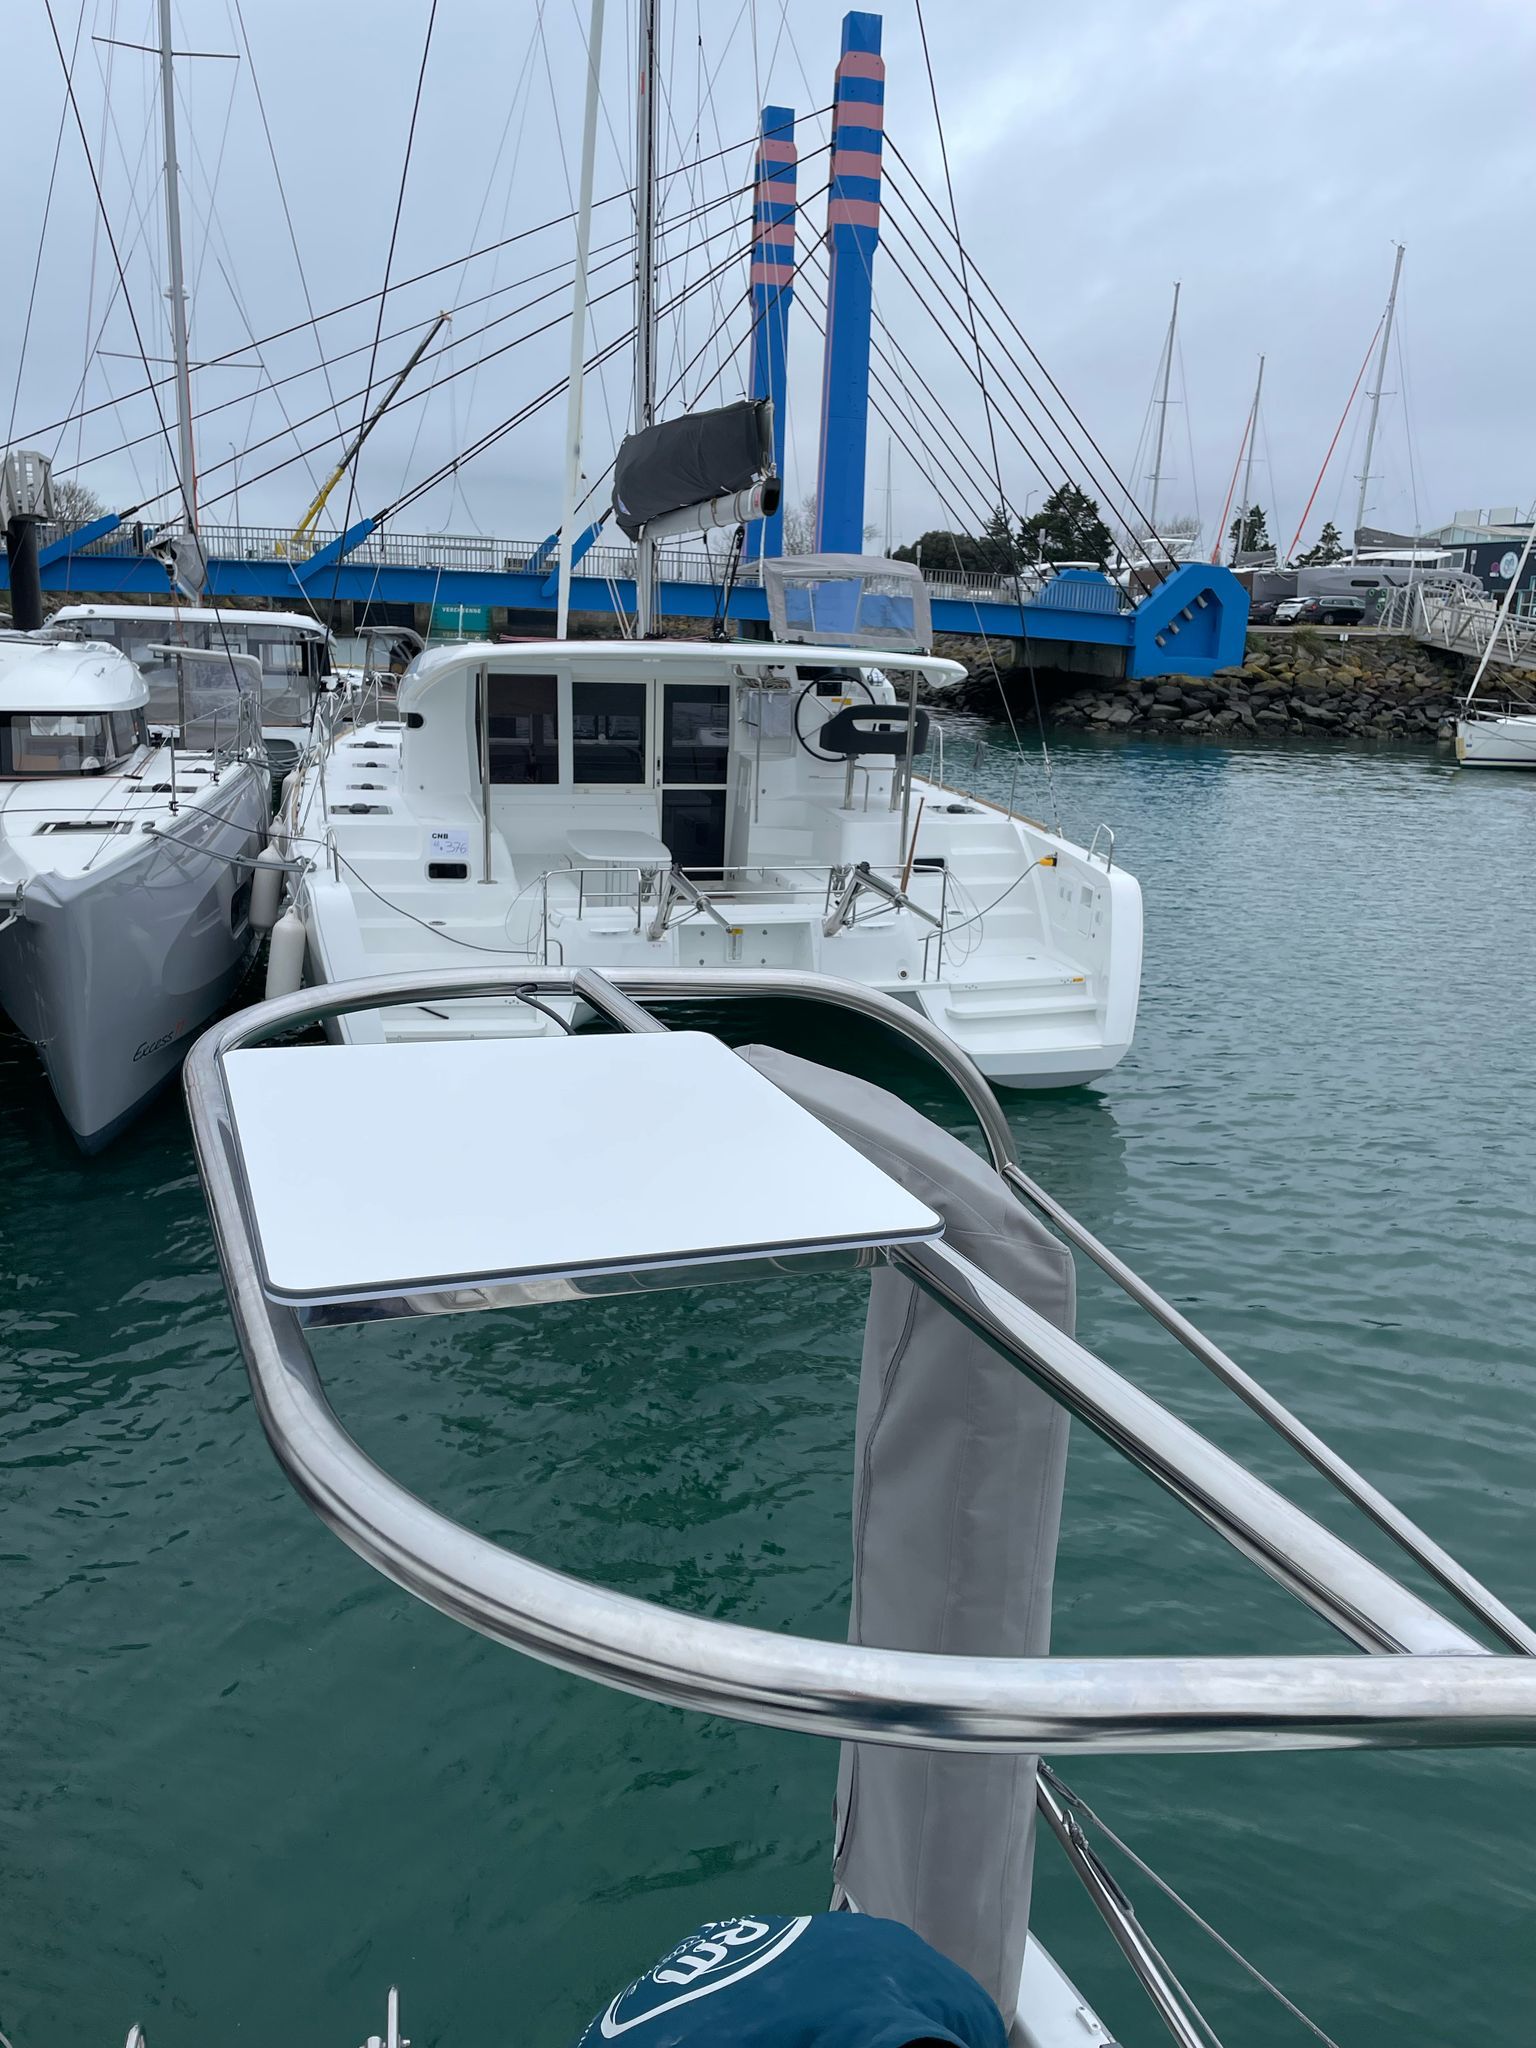
This is really nice as the cloth won’t impact the signal, but it does require a bracket, and cable routing through the frame.
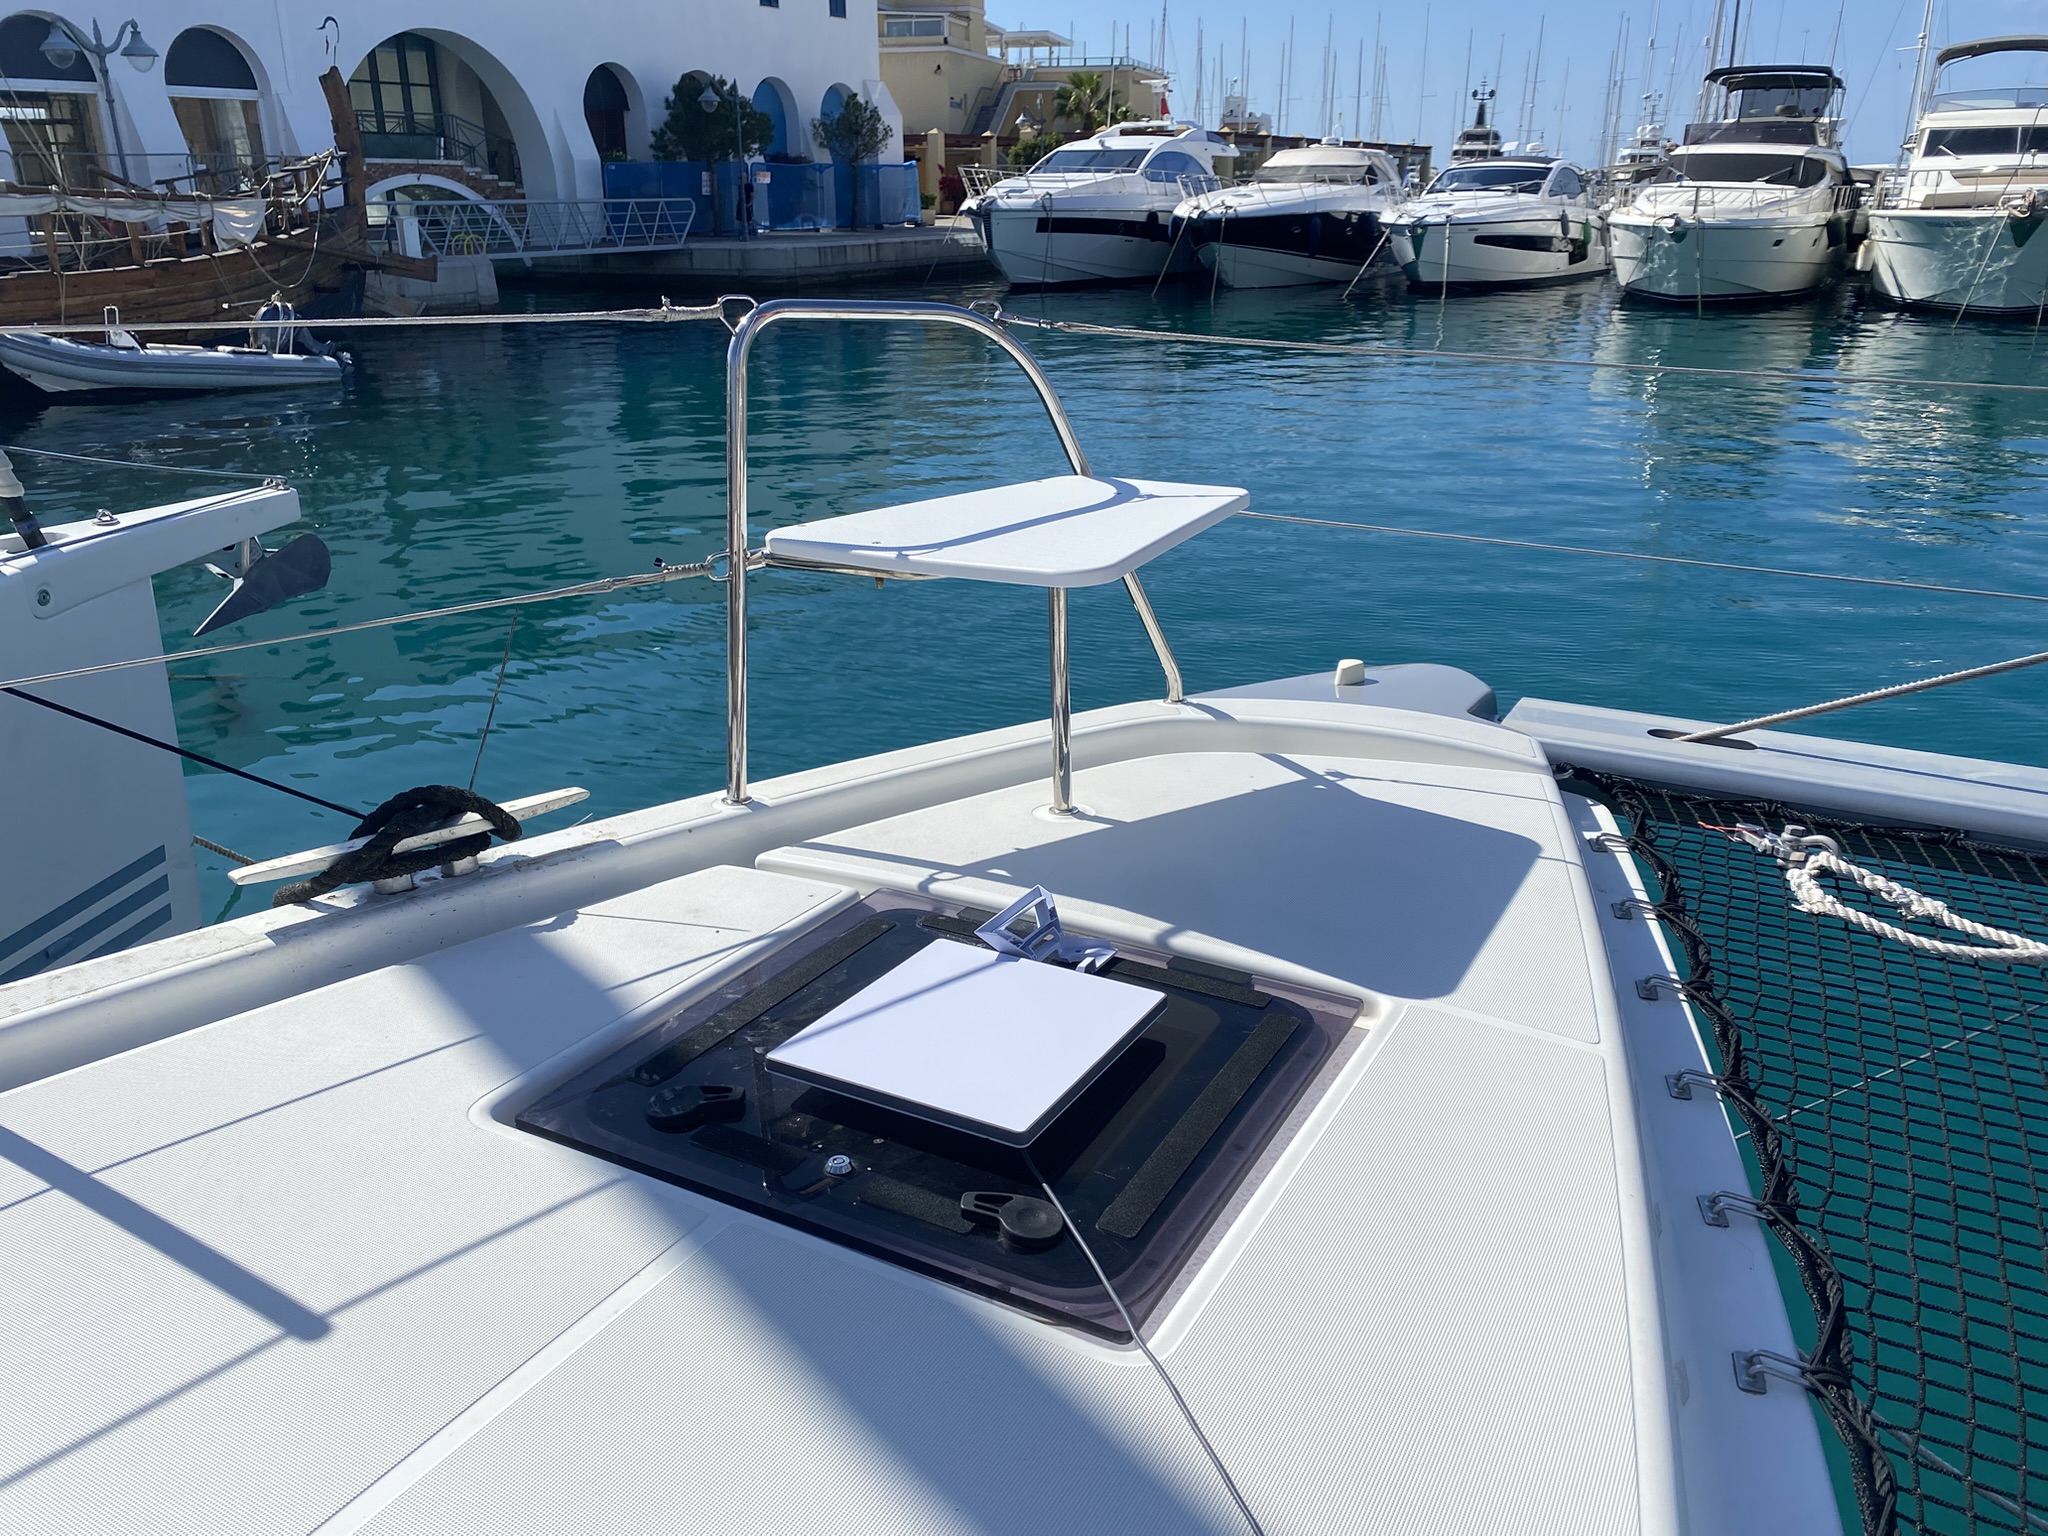
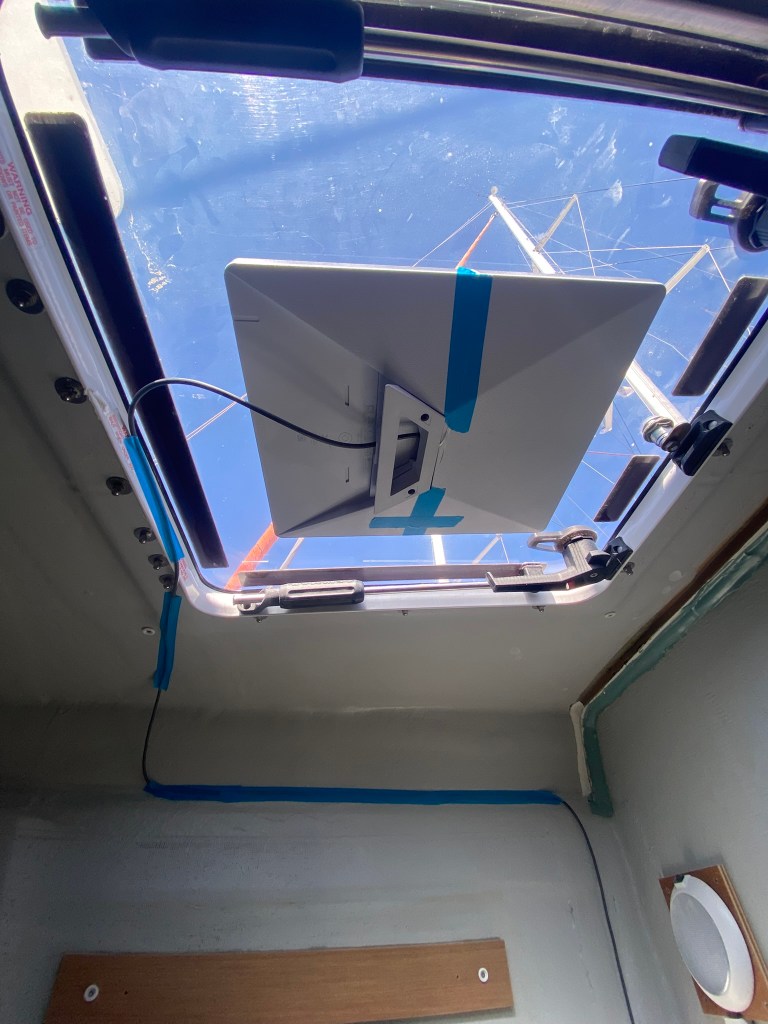
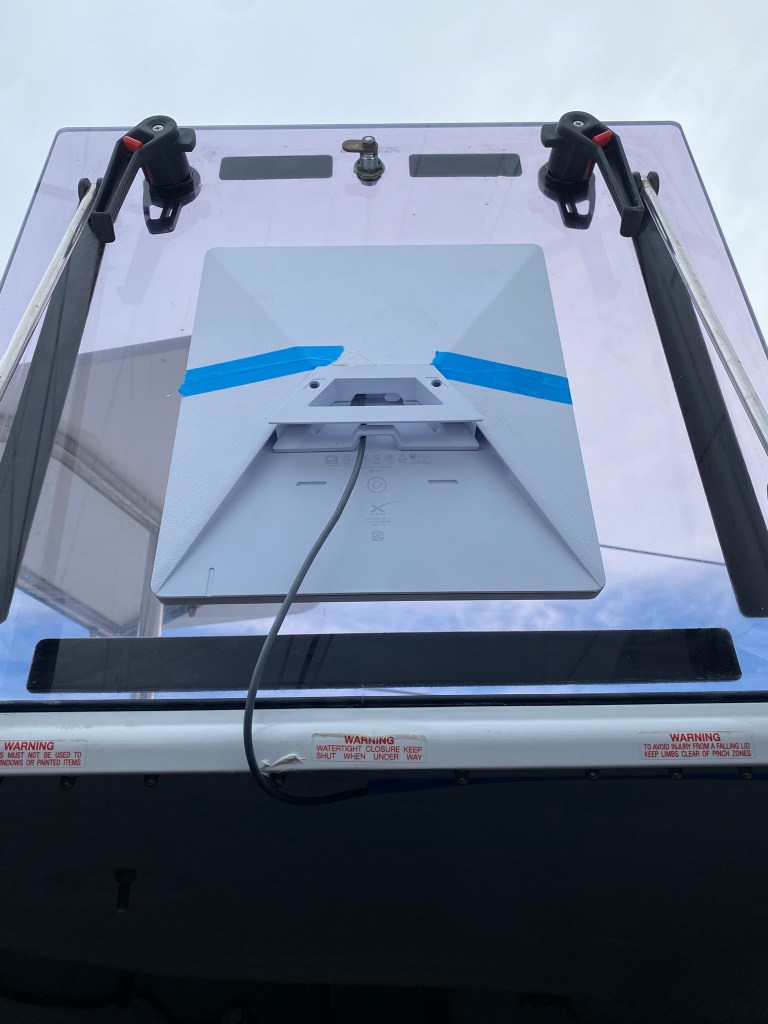
Francois provided this brilliant option to mount them to the port bow hatch. 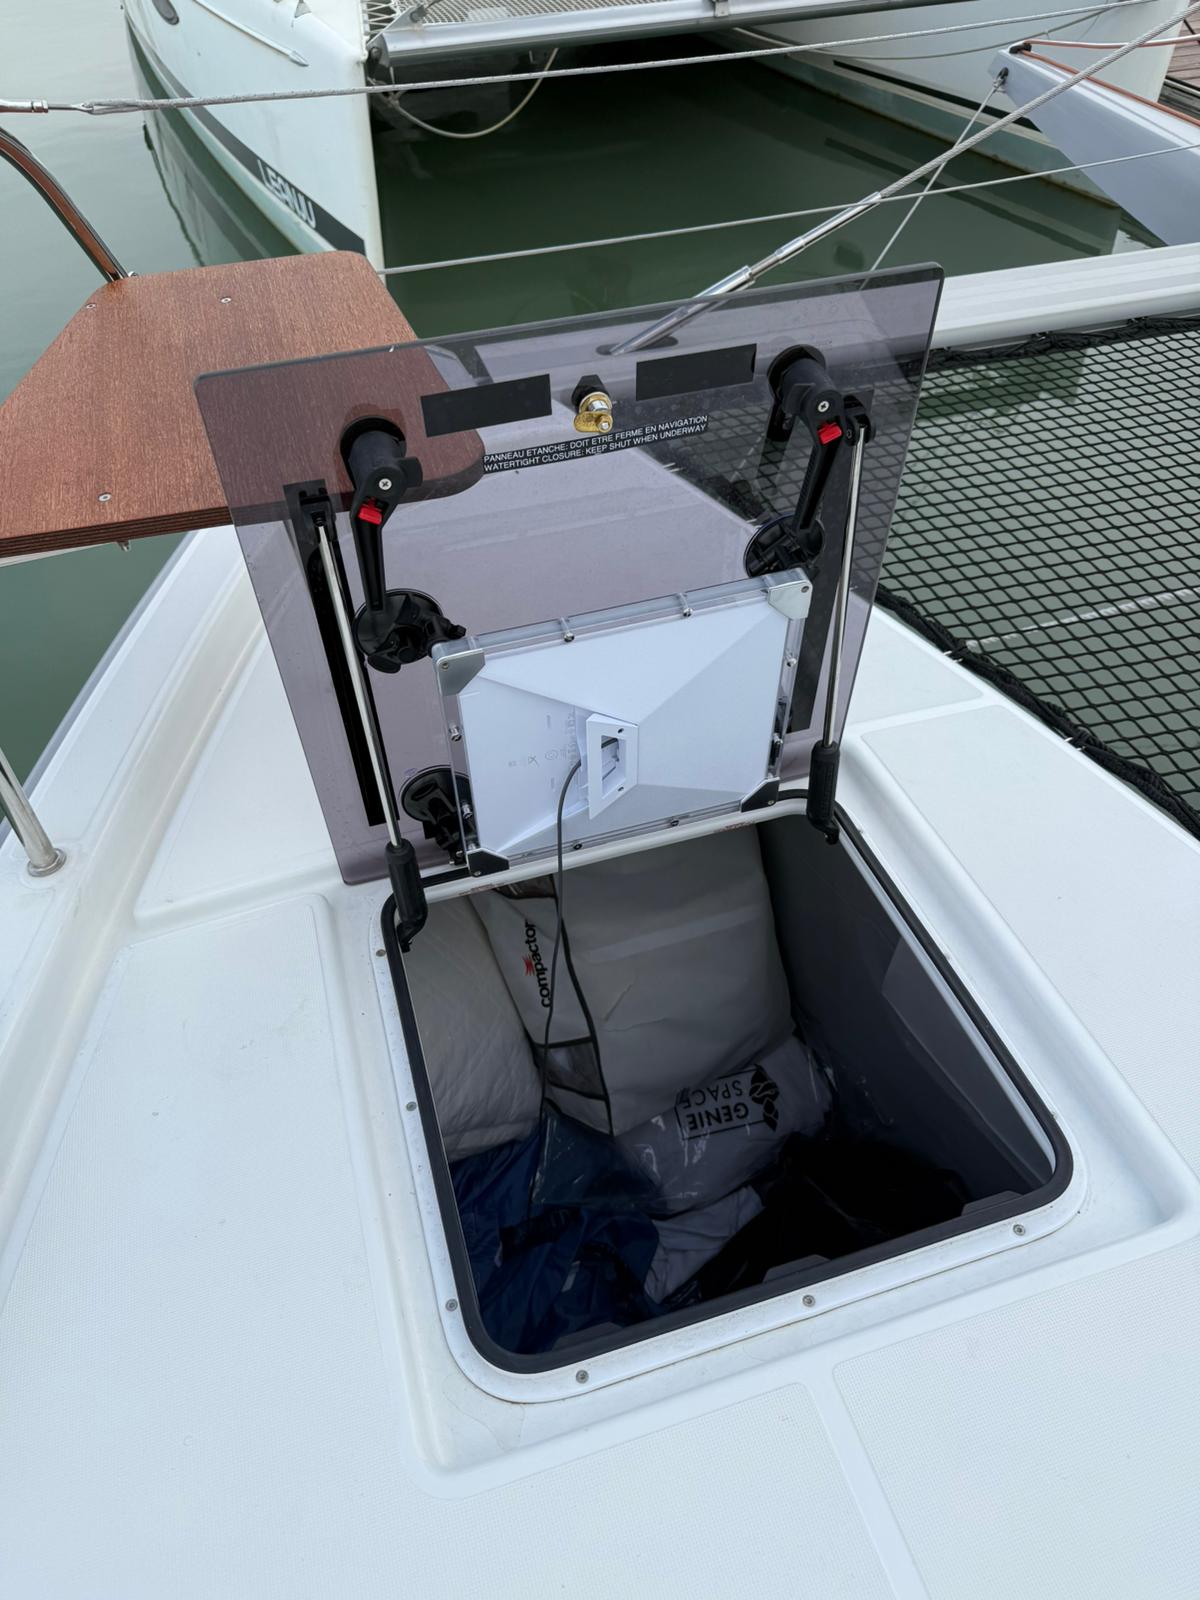
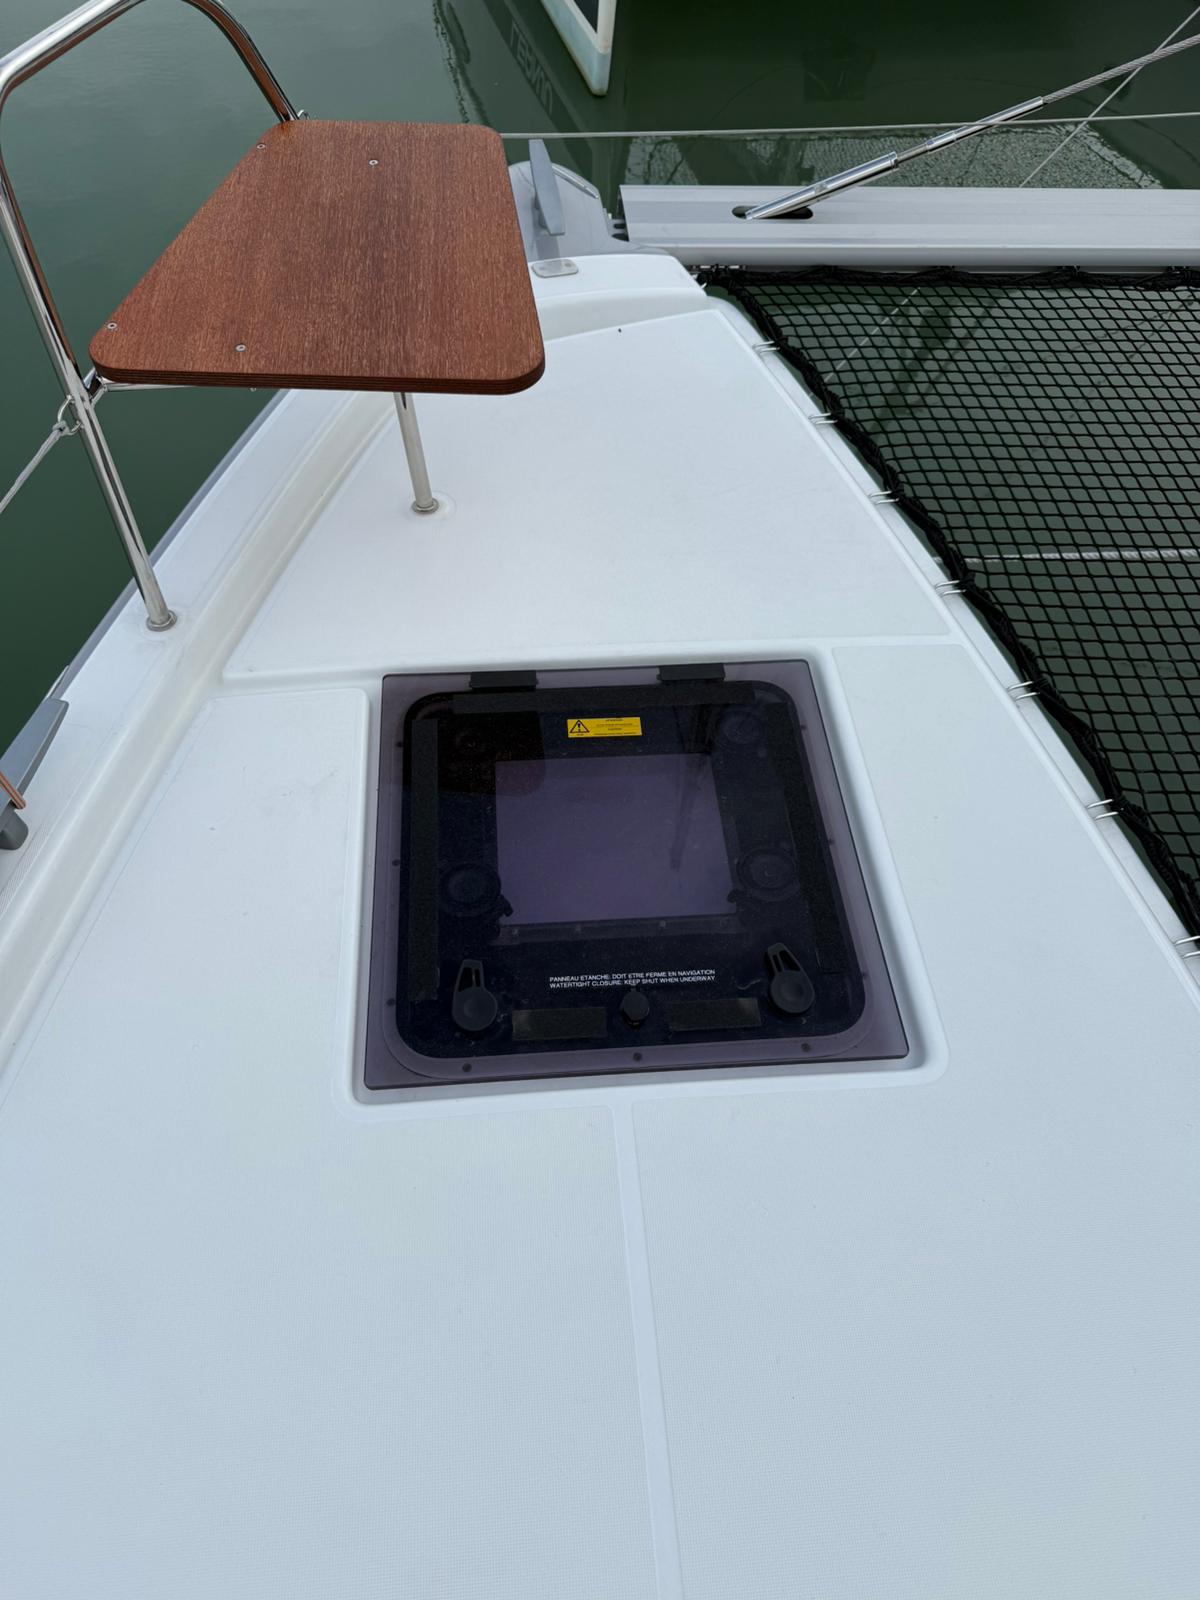
What I really like about this option is no complex mounting required, so this is what I’m currently going with…
Performances Statistics
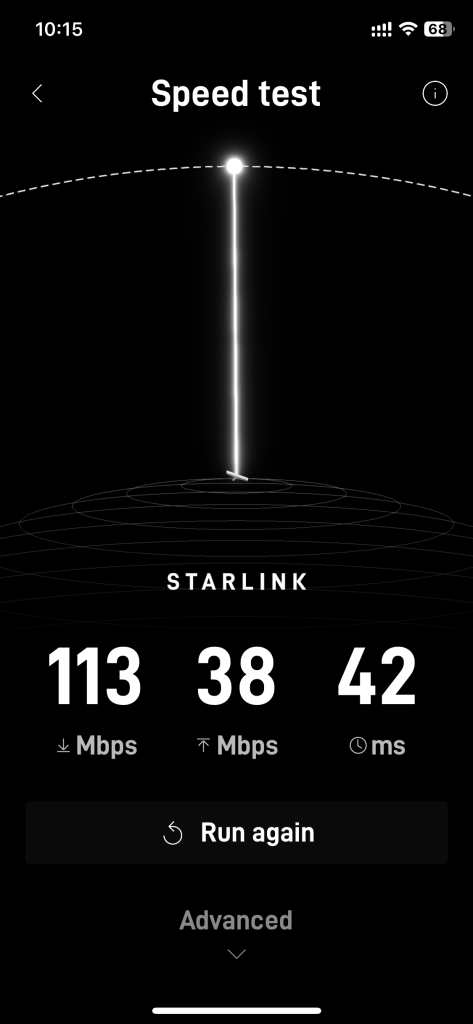
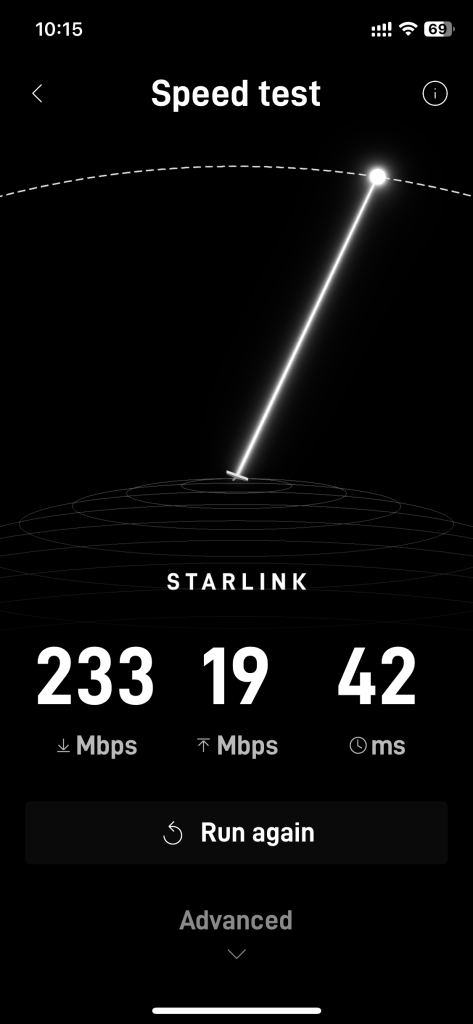
The whole purpose is to get great, reliable internet, so let’s do some measurements. Statistically, putting under the hatch doesn’t appear to have an impact.
The following tests were taken in Cyprus, in the Limassol marina on a clear day, without any sails up. I’ll need to run another test under sail, with the jib out, bouncing around as a comparison.
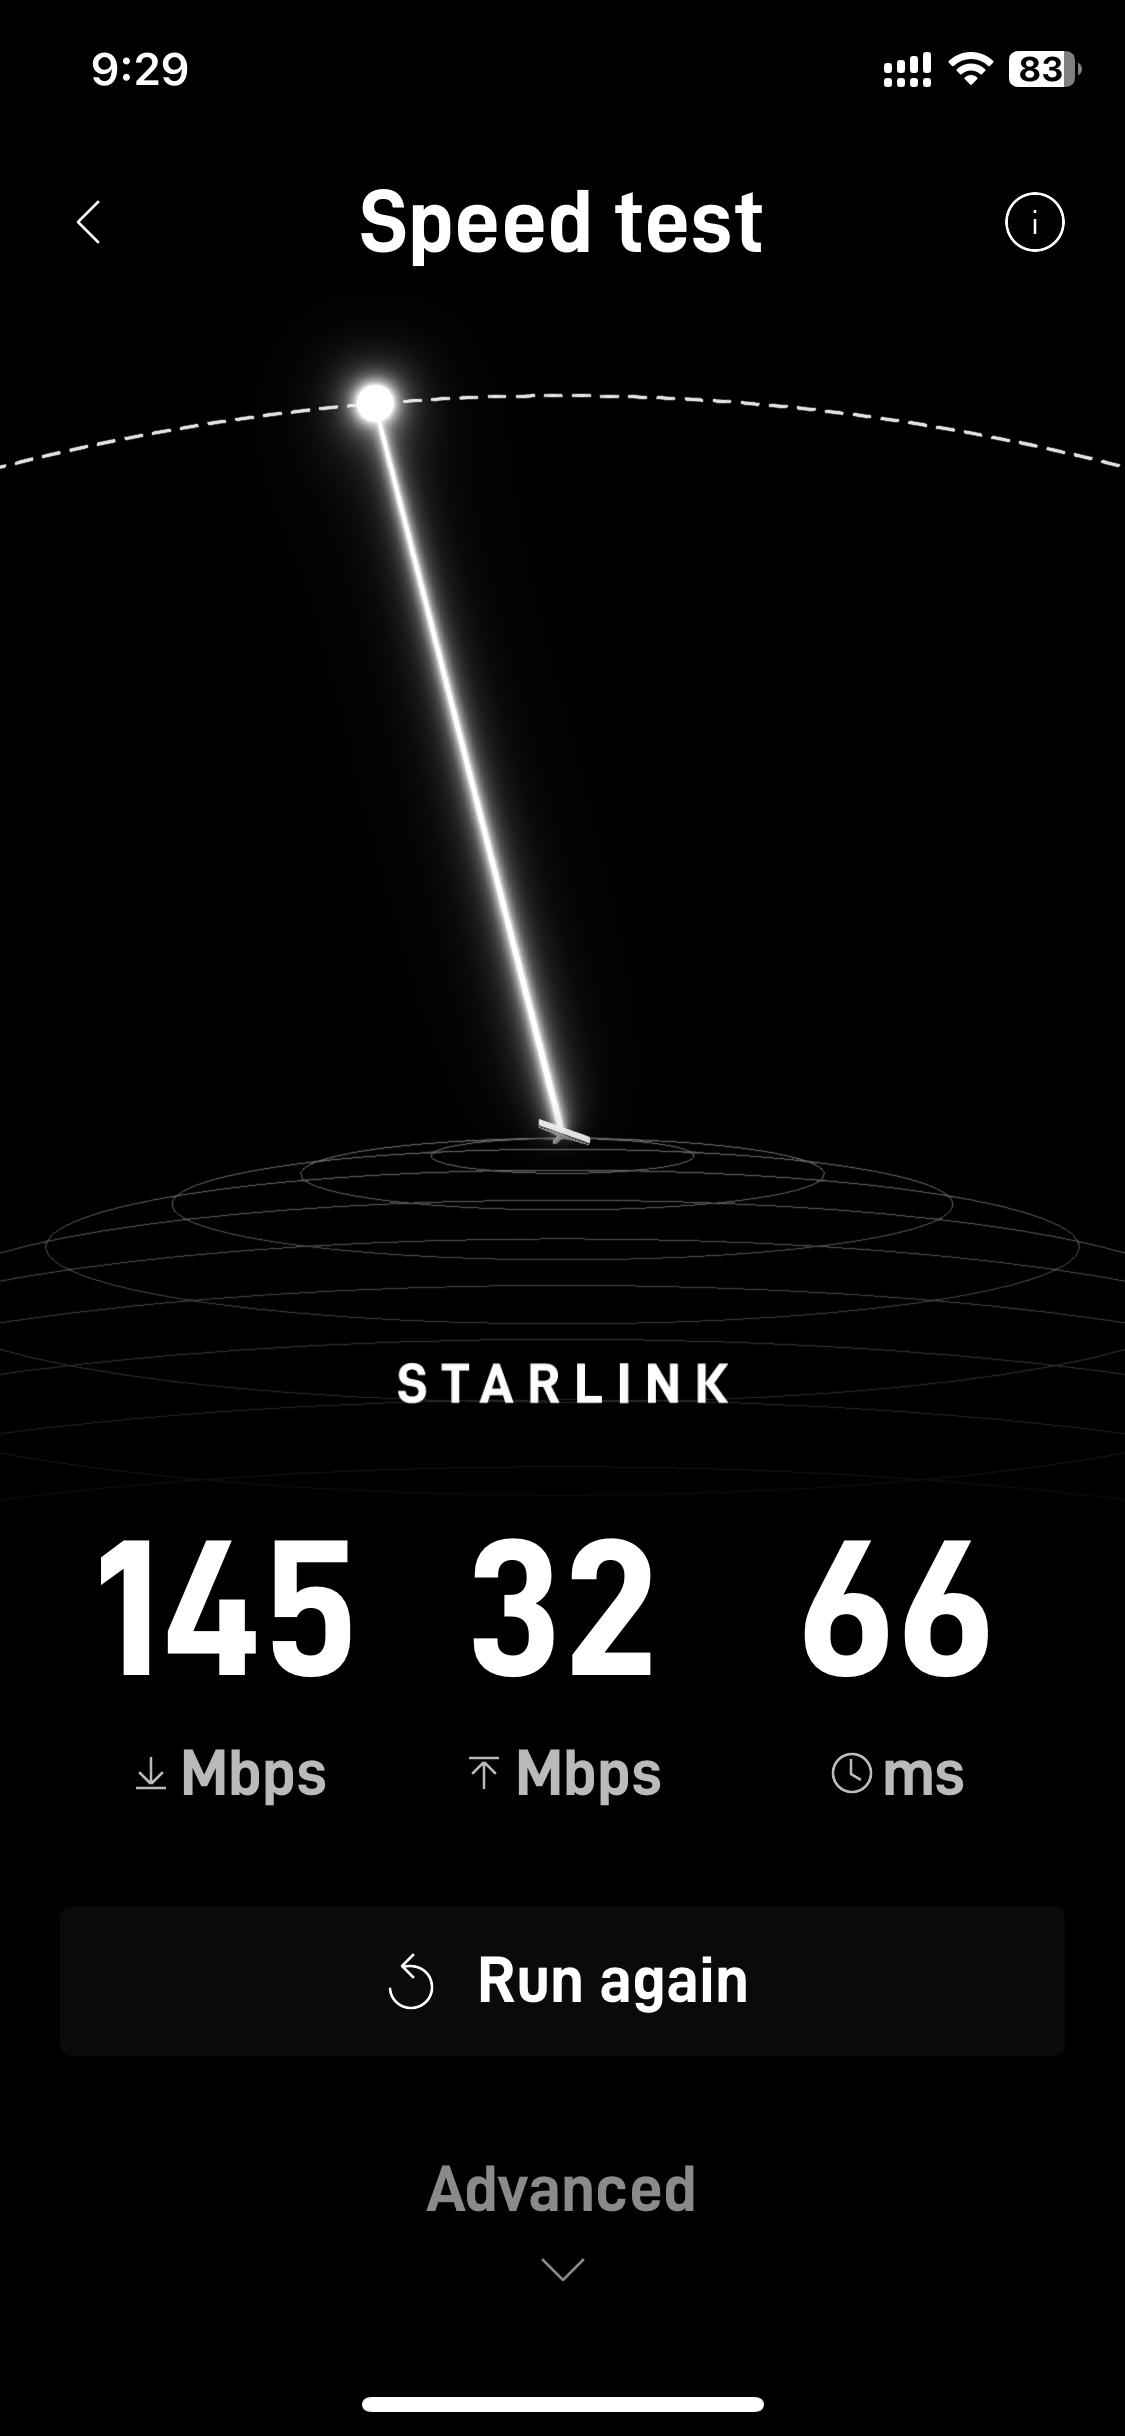
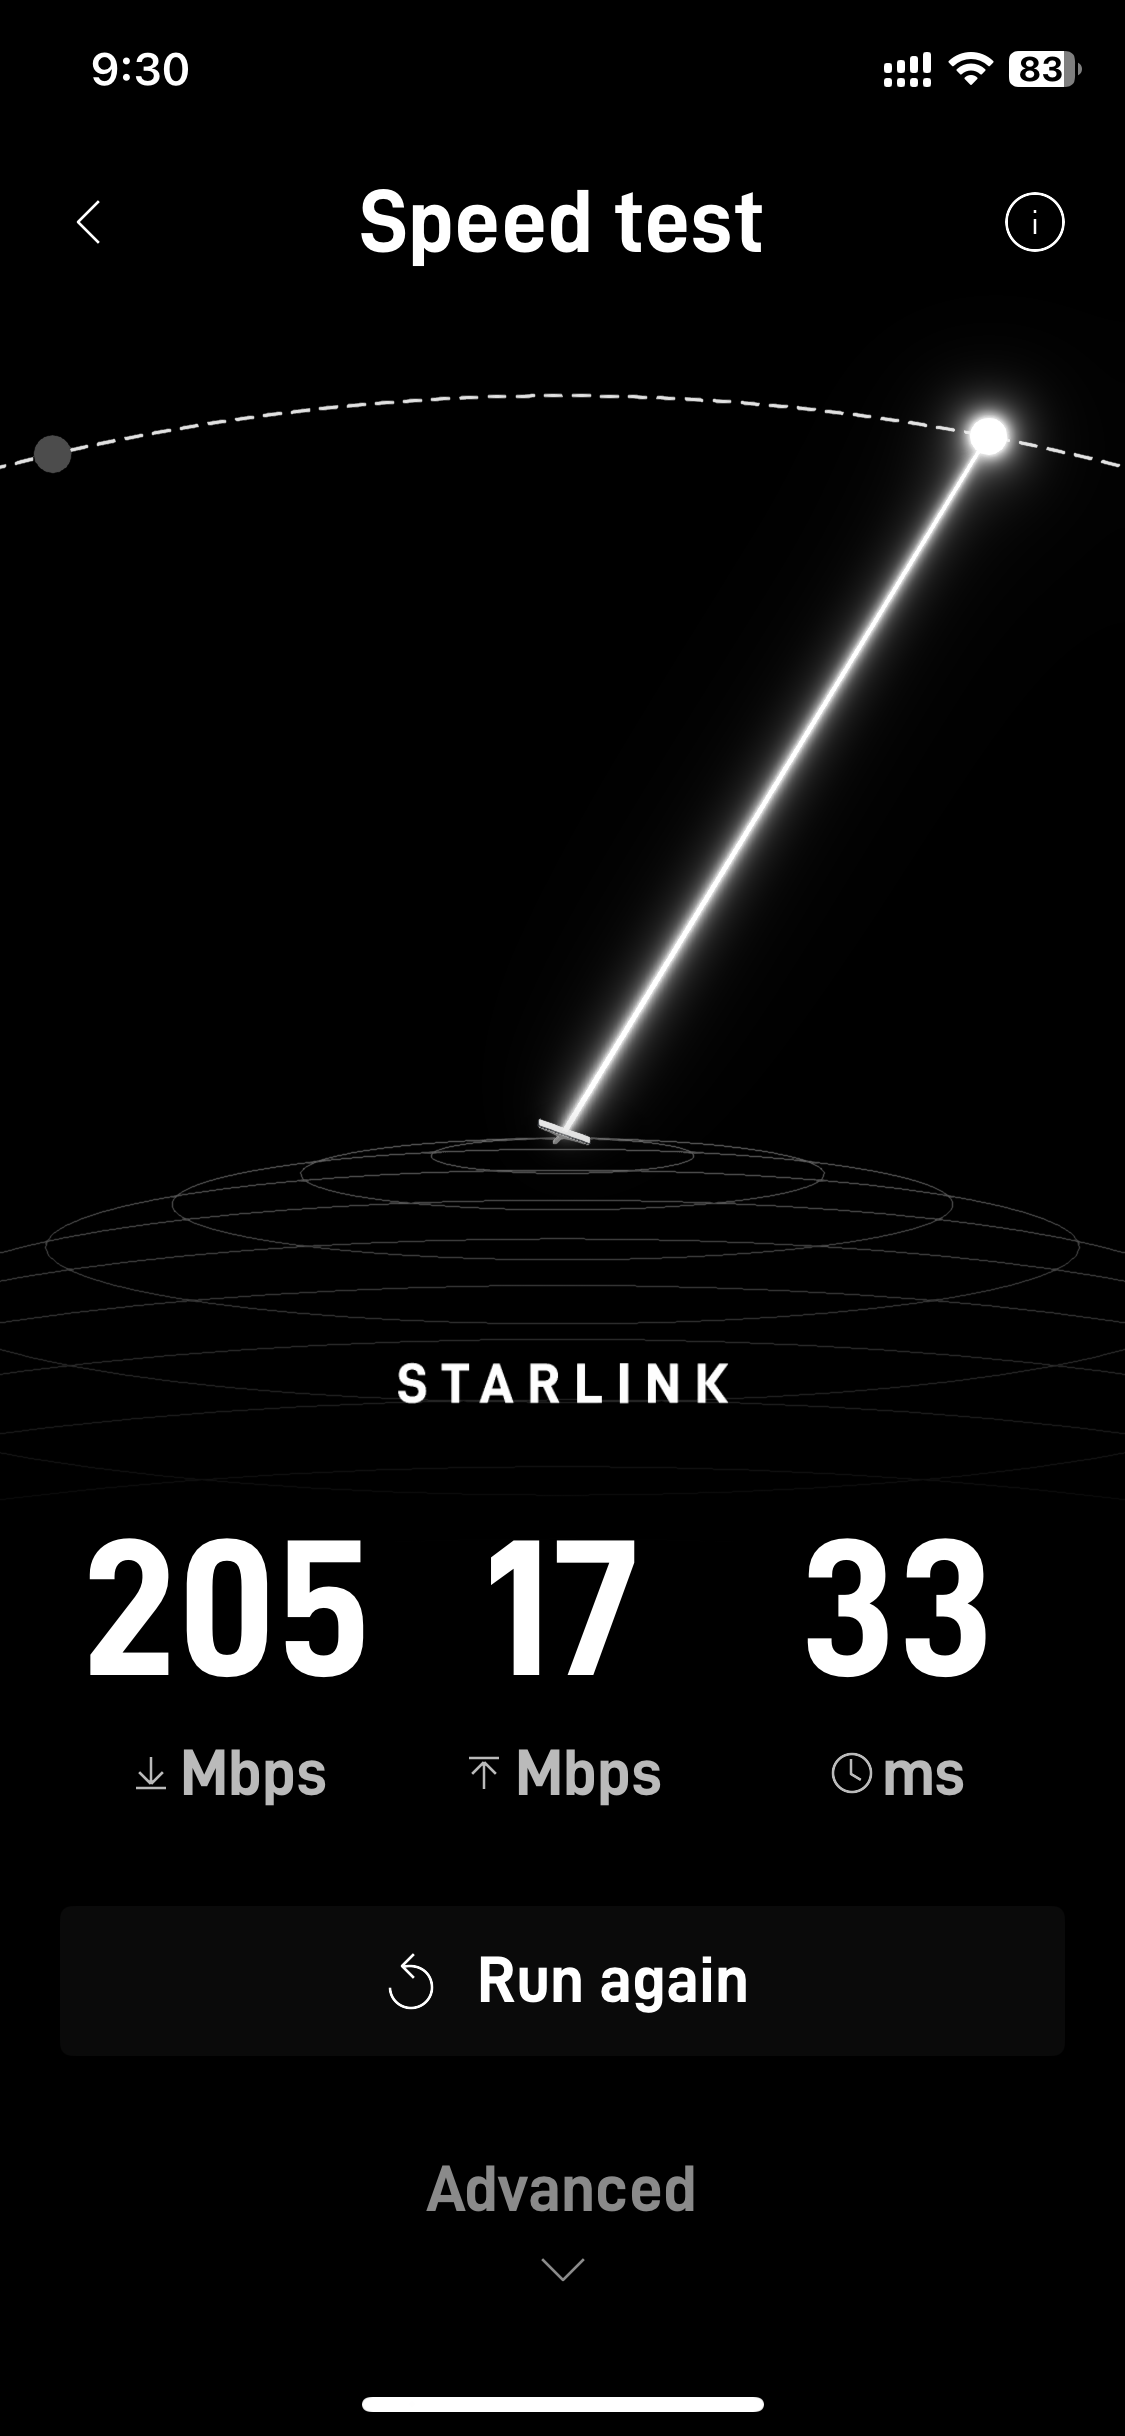
Baseline
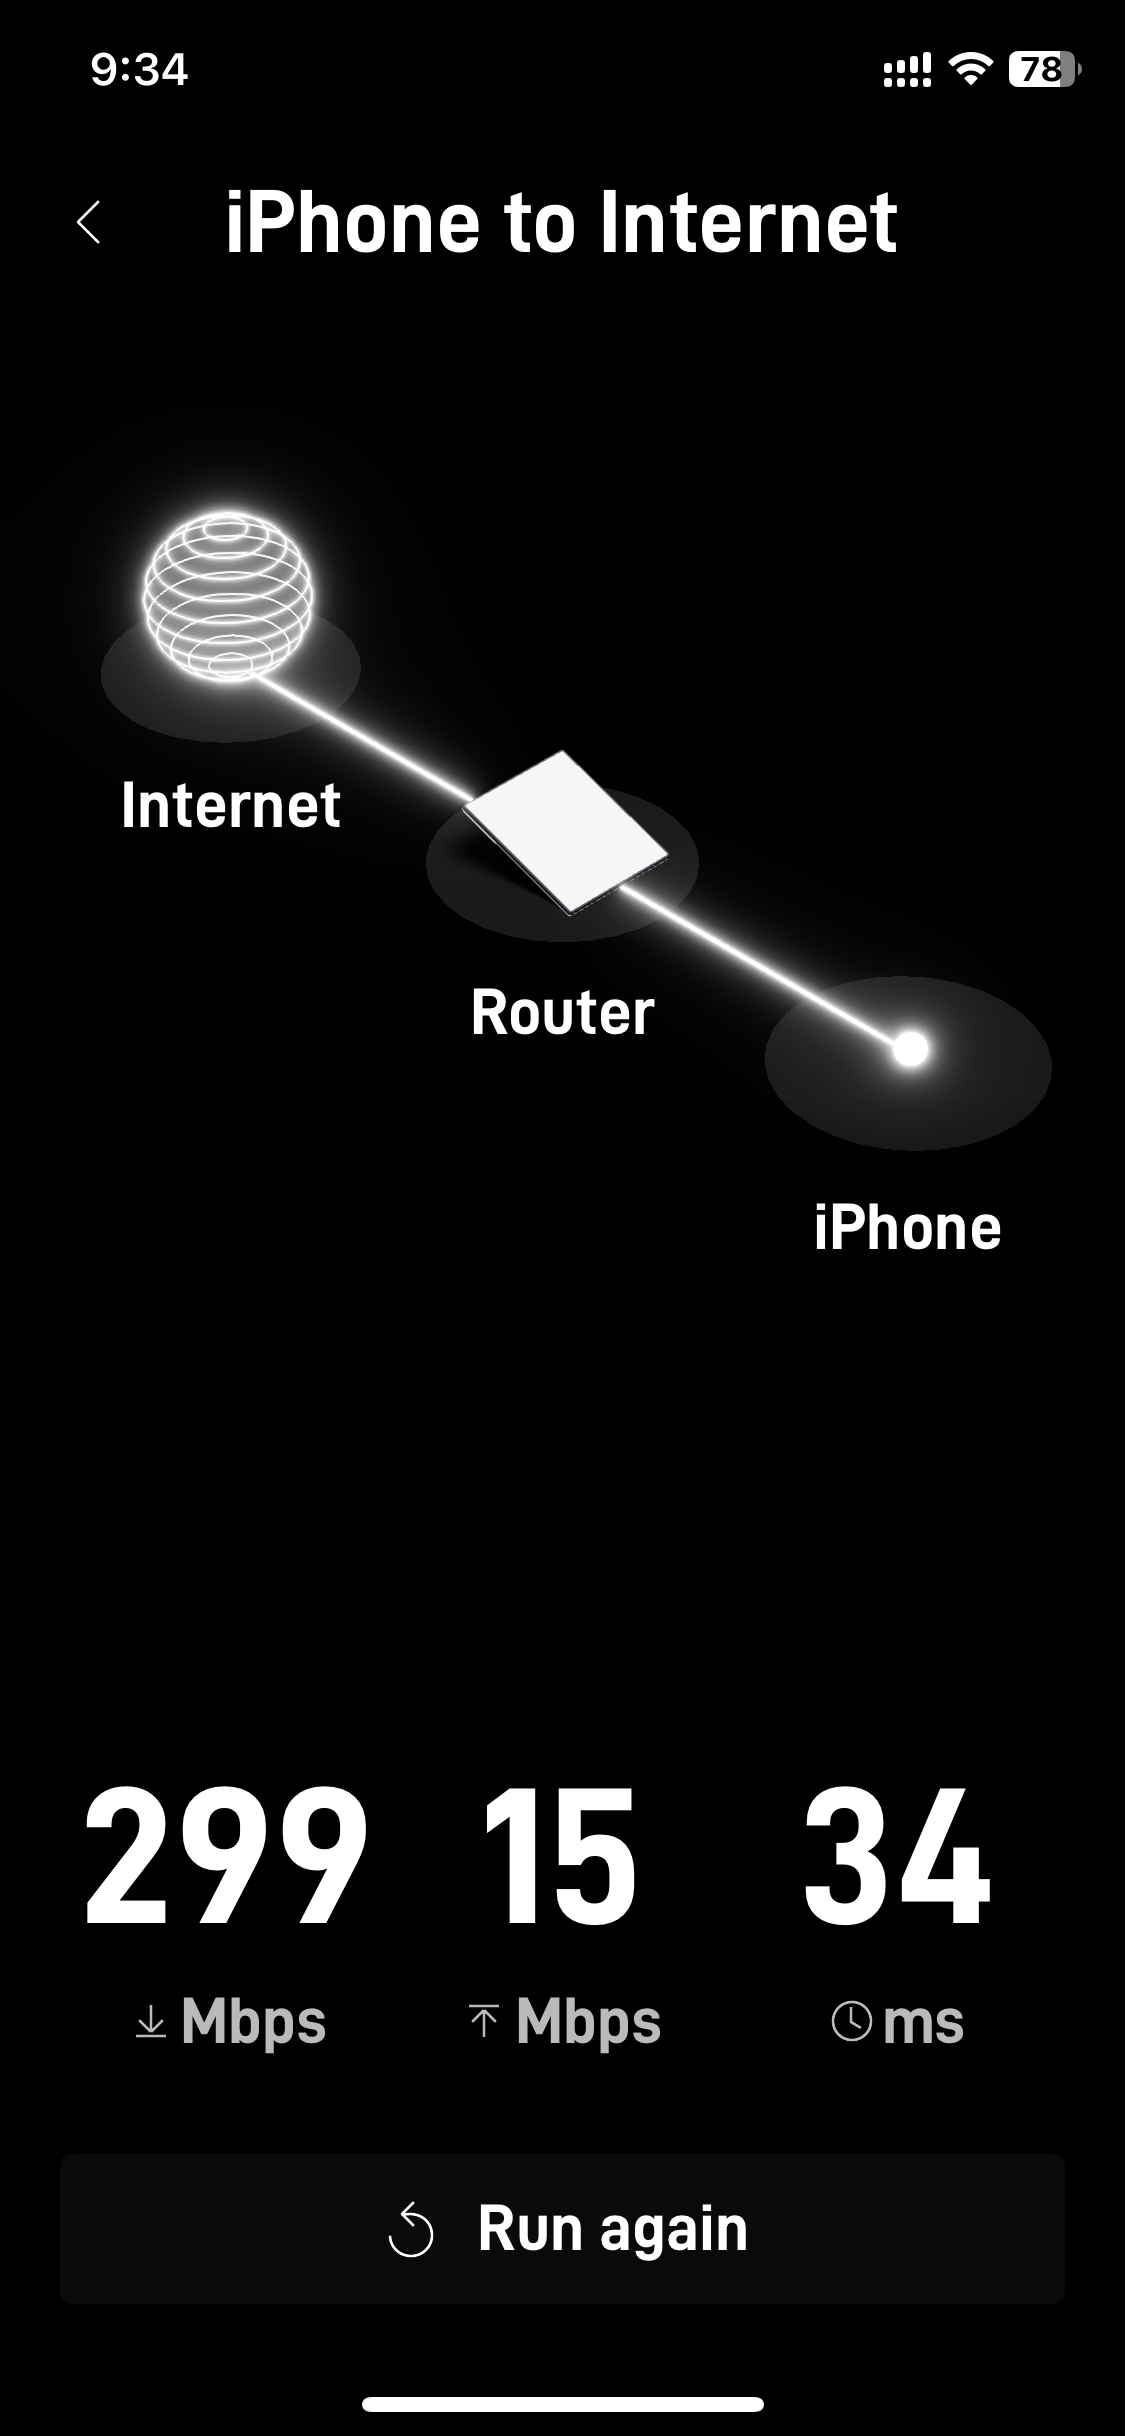
What performance do we get without the hatch? The Starlink App has two modes. “Internet”, meaning the satellites to the Router and iPhone to Internet, which adds the Wi-Fi to the mix. Since it’s impossible to achieve higher bandwidth on Wi-Fi than what’s available, the 299 reflects the large variance between different satellites as they wiz by.
Mounted Under the Hatch
I wanted to use Velcro, but for some reason Cyprus shops only seem to sell male Velcro. We’ll ignore that factoid.
To test this, I used double side tape, with some backup dental floss to remove if it doesn’t work out. My son taught me the dental floss trick from debagging cars.
As I was writing this, we heard a loud thump, which is never good. The heat of the sun on the hatch caused the tape to release from the Starlink. It stayed attached to the glass. I’ve added more tape to the entire perimeter to see if that holds.
We’re going to run with this for a while and see how it holds up.
Cable Wiring
The bow hatch has several advantages as there’s already cabling paths with accessible holes under the port-bow bed.
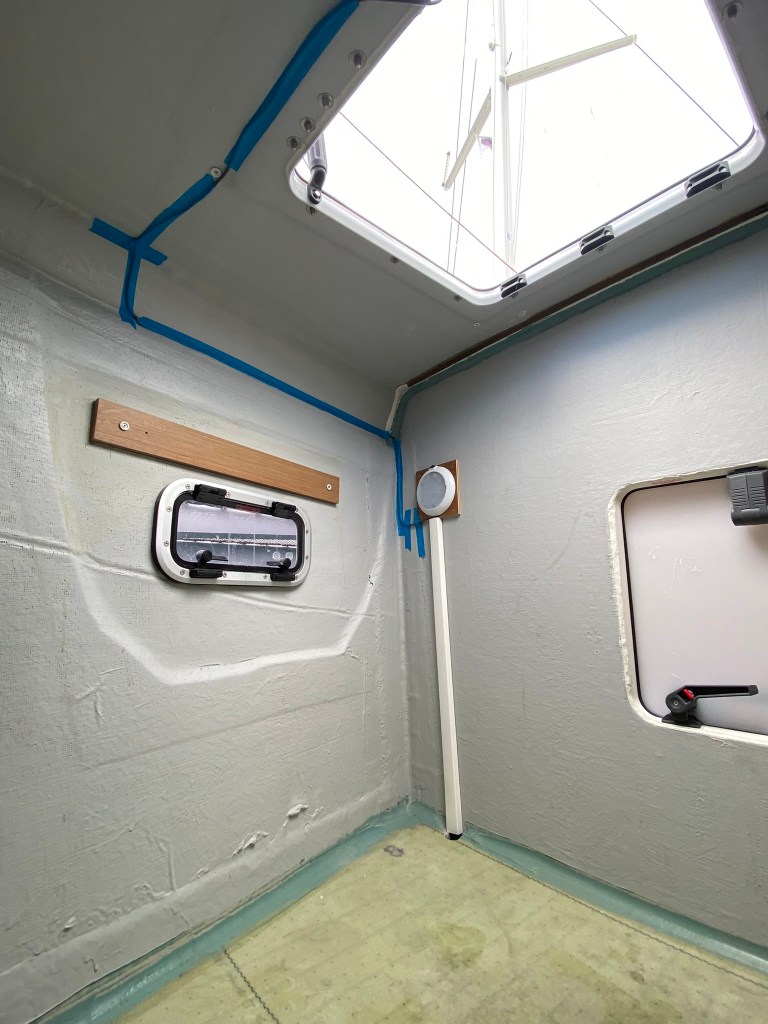
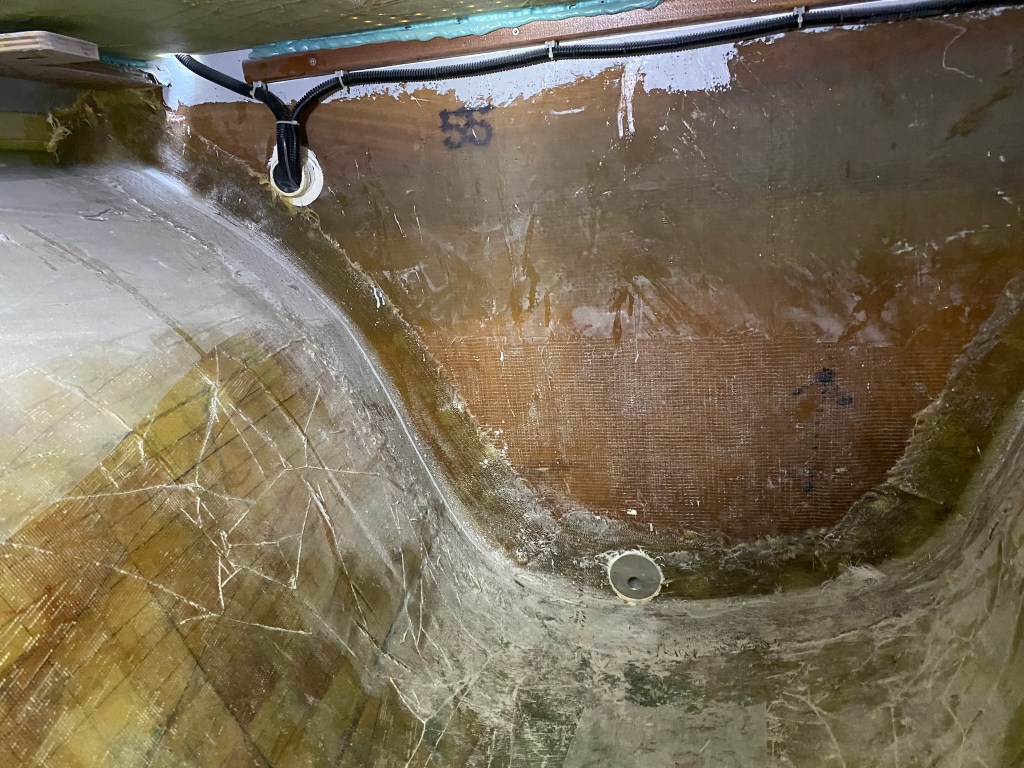
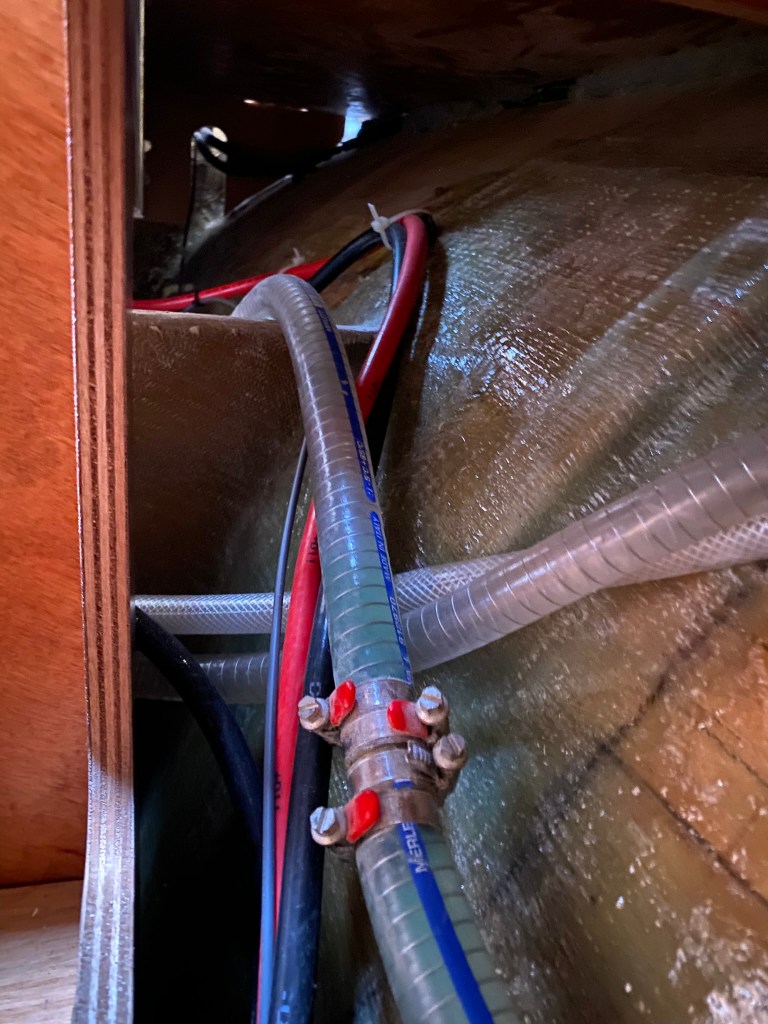
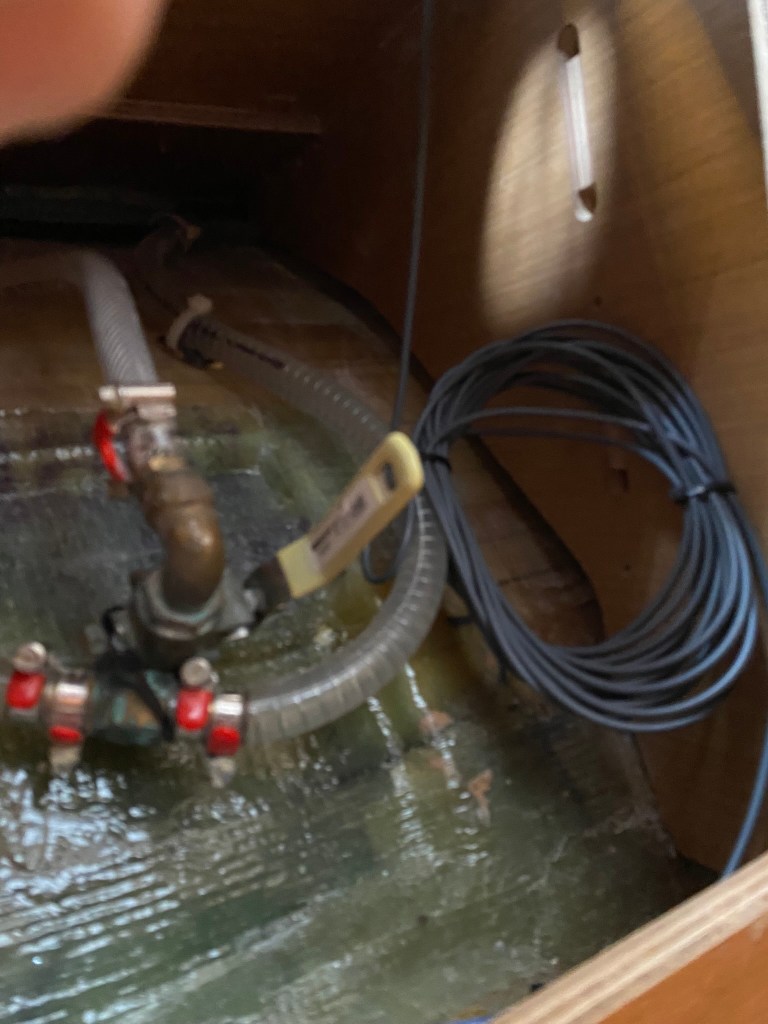
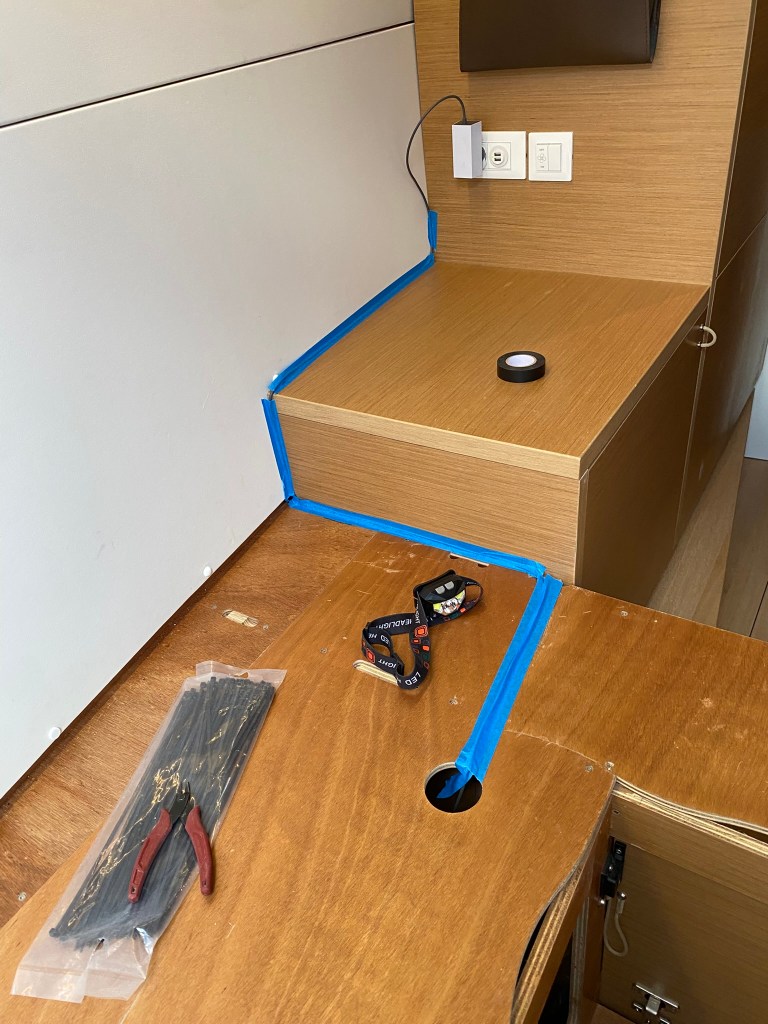
There’s lots of options for where to connect, including temporarily plugging into AC (230v/120v) in the port-bow cabin. Or, running the 12v wire into the power panel. We’re doing some solar/battery/inverter upgrades that will require rewiring the panel, and I don’t currently have a spare 12v breaker, so I’m deferring the 12v connections until the solar project. The blue taped areas are the temp routing, while the wiring under the bead is cable tied in place.
If this all works out, I’ll redo the mount to the window with white Velcro that can be more consistently applied. The current double-sided tape shows some air gaps I can’t remove without pushing so hard, I potentially break the Starlink case. 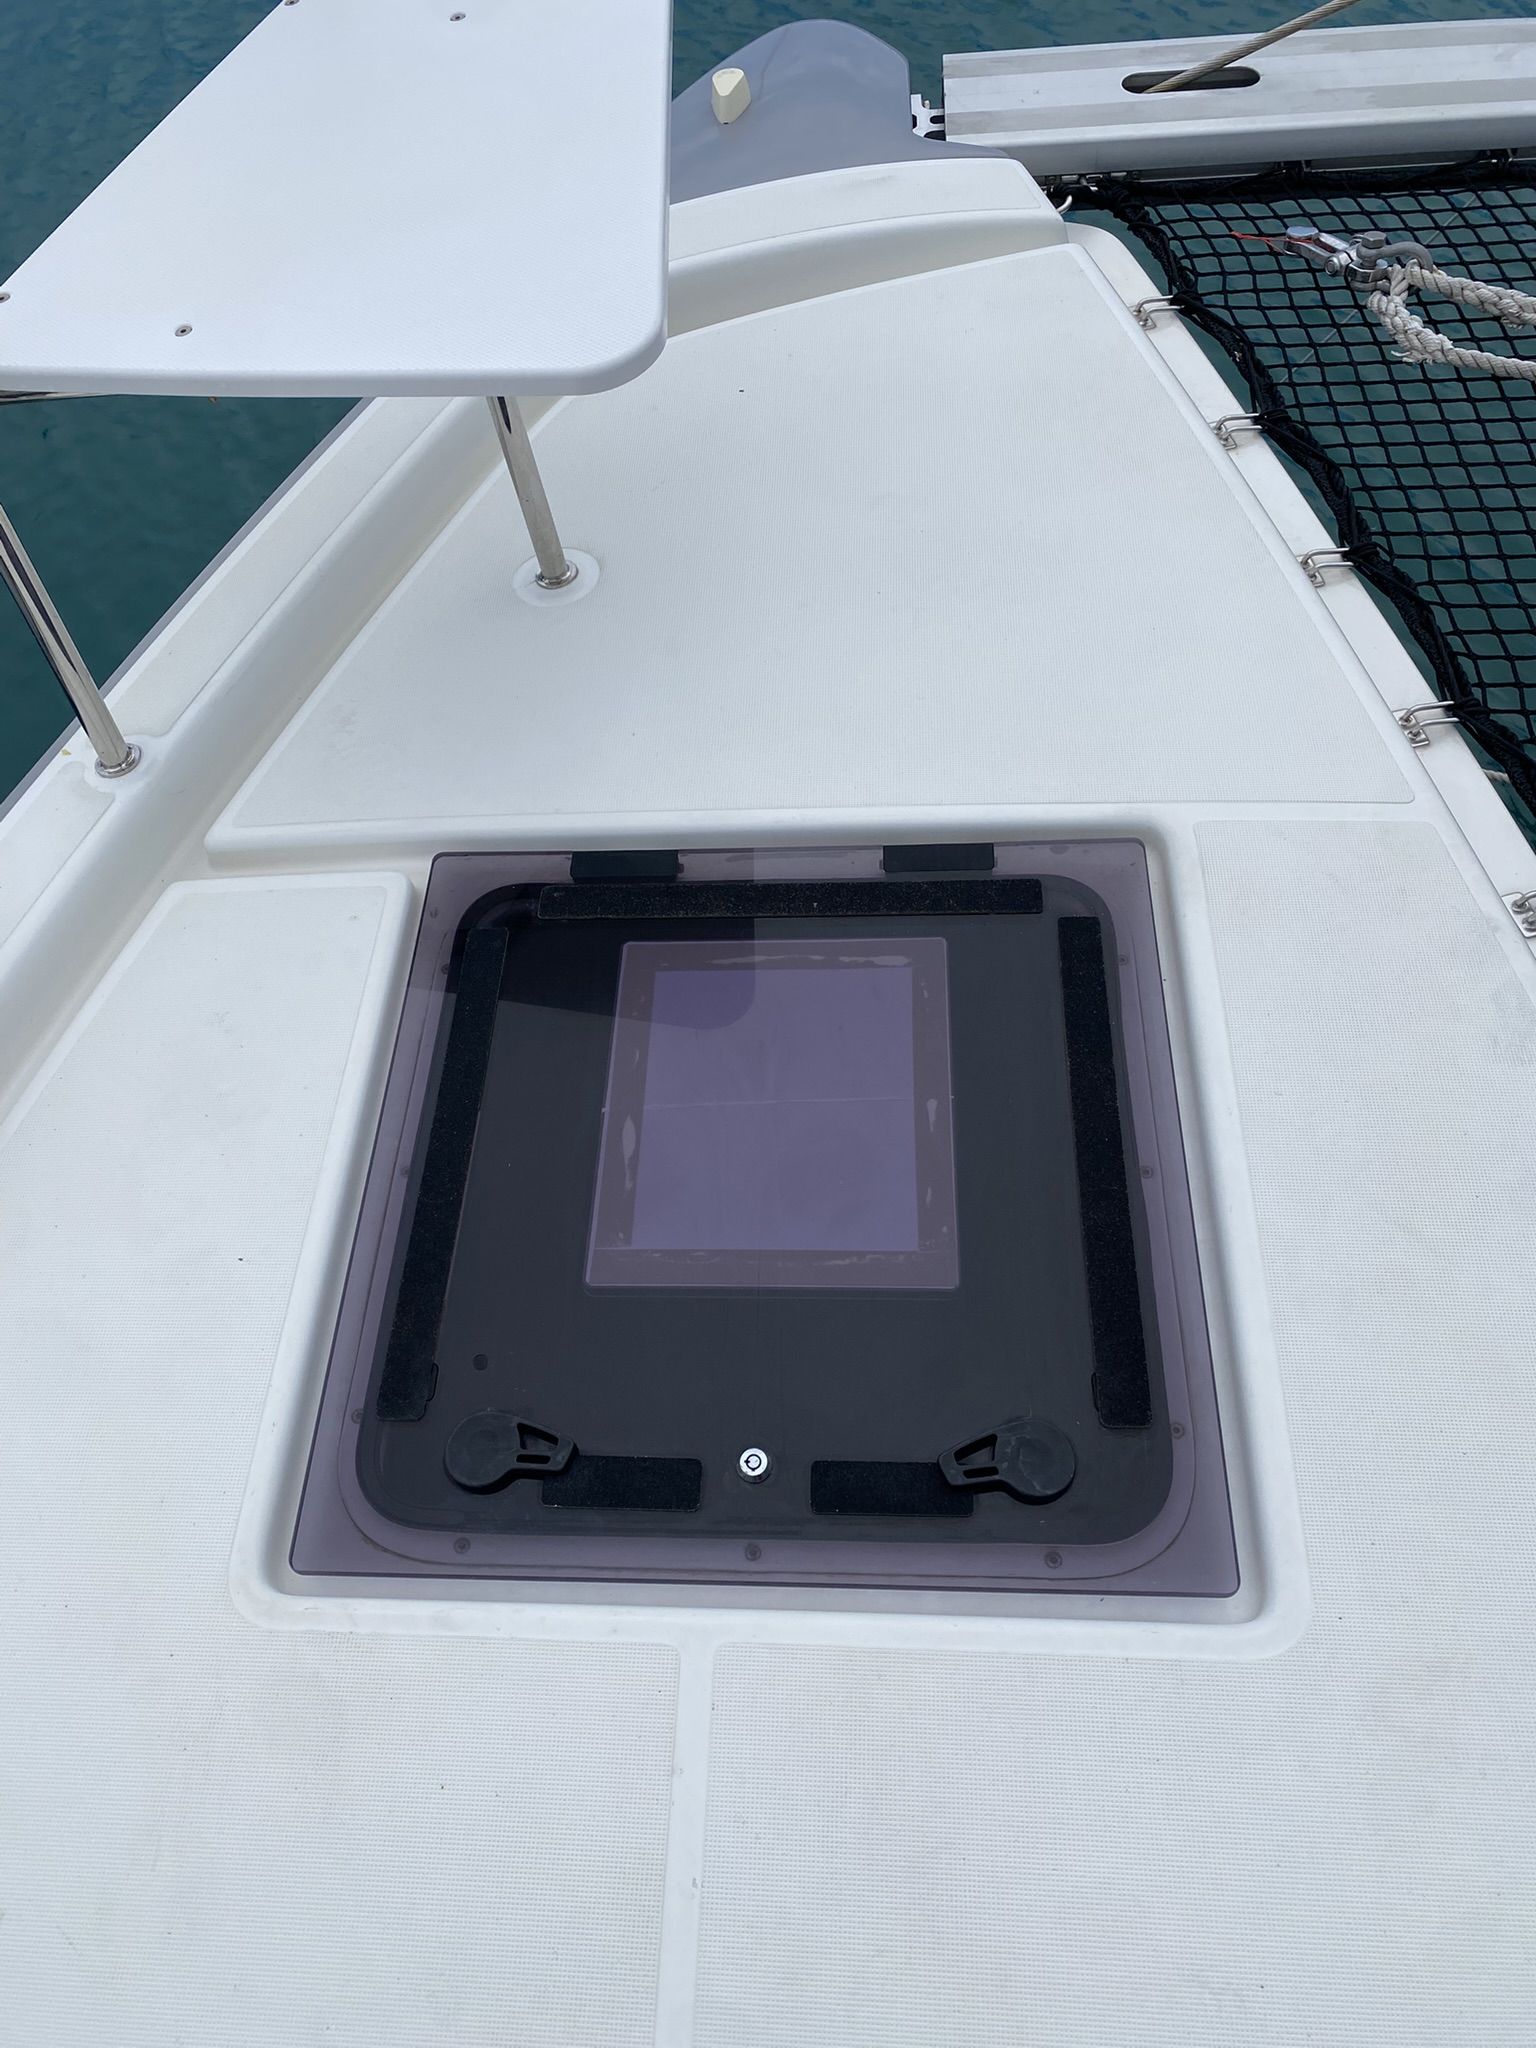
I’ll also put some sort of permanent track in place, similar to the track for the berth wall light.
Note: in the coming month or two, I’ll update this with the final wiring and panel switch to disable Starlink power consumption.

Leave a comment